Thanks for joining us for another video in our ADAS series featuring the Hunter ADAS link and the DOS 3000. Today we’re going to get into calibrating the forward camera on a Stellantis or FCA vehicle. We’re going to show you how that’s done in just a minute.
Remember, anytime a windshield has been replaced, as in the case of this FCA vehicle behind me, you’re going to need to calibrate the camera. First thing we’re going to want to do is hook up our VCI to the DLC and get into diagnostics.
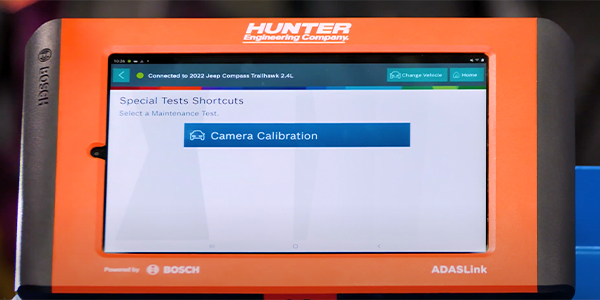
You’ll notice that a warning does pop up on our screen here, letting us know that this vehicle has a secure gateway, meaning you need to have your auto off, registration completed and signed up for before you can do any test or special functions on an FCA vehicle. We have our’s set up, we’re going to go ahead and press okay, and we’re going to go to ADAS calibration and just a second here, I have a couple options, and of course we’re going to be dealing with the front facing camera today or the FFC, so I’m going to select that.
At this point, it’s asking me to sign in to unlock the gateway. The gateway is essentially what we call like a firewall, so you can check DTCs and you can check live data. However, without an auto off account, you cannot clear any DTCs and you cannot perform any special tests. So right now it’s asking me for my username and my password, which we’ve already set up our account. Another thing to keep in mind, make sure you have a strong wifi connection or you’re hardwired.
So I’m going to enter in my password now. After entering my username and password for auto off, I am able to get into the special test now and continue on with the camera calibration. Remember, we’re going to carry out this procedure anytime the windshield has been replaced, there has been damage or instructed by a TSB recall or a warranty procedure.
Before aiming, make sure that all the tires are properly inflated, the vehicle is not loaded, meaning weighing down the vehicle, which would alter our height of the actual camera, windshield is clean and the camera has nothing to obstruct it. Right now it says, this procedure will require the vehicle to be driven.
Couple things to keep in mind when we’re doing this: dynamic procedure must be done on a flat and straight road. We’re going to be driving this vehicle and it’s going to need to see a lot of things before it completes the process of calibration. At this point, it’s also telling us, be prepared to drive before pressing continue.
So what I’m going to do now is go ahead and get in the car, get this thing outside and ready to be driven before I press continue. Before I press continue, I’m going to go ahead and get on a road where I can maintain a speed of 25 to 74 miles an hour with lots of lane markings and then we’ll press continue.
You’ll also notice on the screen it says that we should have fair weather to do this. Unfortunately, in the case of today, we have a little bit of rain. It could hinder our calibration process, but sometimes you live in an area where these things occur and the customers are expecting their vehicle back. We’re going to go ahead and give this a try and see if it’ll calibrate with a little bit of rain in the area. I don’t foresee any big problems with it. But just letting you know it could create an issue for you or your calibration. I don’t want to return the car back to the customer yet, until I’ve successfully completed this.
Okay, we’re going to go ahead and press continue. One other very important thing to consider before you leave the shop, to stay in my secure gateway, I still need internet access. It’s very, very important. Set up a wifi hotspot using your phone and have it connected before you leave the shop. As soon as you lose an internet signal, you will be kicked out of the auto off and that’ll also kick you out of the secure gateway. So make sure before you leave and before you press continue and on your drive, you are connected to the wifi on a mobile hotspot.
Another very important thing to remember why you’re doing this calibration and driving, is that you can maintain the speed that it asks for. Anytime you drop below that 25 miles per hour, if you had to stop at a red light or a stop sign, you will be kicked out and you’ll have to start all over again.
Calibration reached a hundred percent and is asking us to pull over to a safe location and press continue to finish the procedure. Turn the ignition off.
If calibration has successfully completed, you’ll also have a report that has successfully uploaded, which we can print out and give a copy to the customer. This will indicate that we’ve completed the process of calibration. The weather may have not been perfect, but we were able to successfully complete it.
The last thing I want to do before is test drive it and make sure that the system is working as designed. Finding a road with good lane markings is going to be really helpful when you’re test driving to make sure the system is working. And you can see I crossed over that, make sure you’re very, very careful when you’re testing these systems, no oncoming traffic that would put you in any risk of danger. But you do want to test the system that is going from green to white and the system is operating, that the vehicle is maintained in between the lines on your lane departure warning system.
The calibration was successful and we just test drove it and verified the system is operating as designed. I can safely return this back to the customer and also provide them that detailed report indicating that the system was successfully calibrated. Remember, check out the Hunter YouTube page for any more of these ADAS videos on a ton of different systems out there that you might want to see how to do it before you do it. Thanks for watching.
This video is sponsored by Hunter Engineering.